

Spot the difference
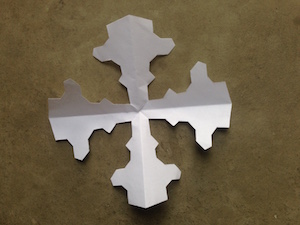
Here is a close up view of a real snowflake, and here is a photo of a paper one I made ...
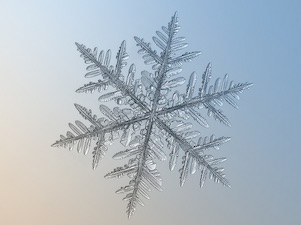
What’s wrong with my snowflake? It only has four arms, rather than six. Real snowflakes (ignoring any defects or melted bits) have six-fold symmetry: a snowflake looks the same if you rotate it by 1/6 of a full turn. This is because the ice crystals that make up a snowflake have a structure very close to a hexagonal honeycomb. (You can read more in Ian Stewart’s lovely article.)
If I rotate my paper snowflake by 1/6 of turn it does not look the same, it only has four-fold symmetry. How can I make a paper snowflake with the same six-fold symmetry as the real one?
Double trouble
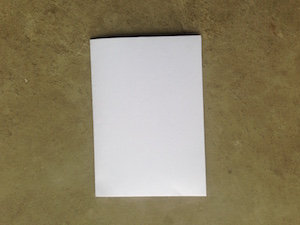
I made my snowflake the same way many of us make paper snowflakes. I started with a piece of A4 paper, folded it in half, folded it in half again, then folded a final time to create a point that would become the centre of my snowflake.

The centre of my snowflake is the middle of my initial piece of paper. With each fold I halved the angle of paper I could see around the centre. After the first fold the centre for the snowflake was half way along this fold, and we could see 180 degrees of paper around this point.
With the next fold (folding the paper in quarters) we could see 90 degrees of paper around the centre of the snowflake, which is now at the corner of this new fold.
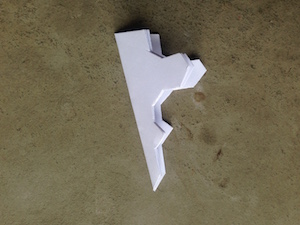
This angle is halved again with the next fold, so that we can see 45 degrees of paper around the centre. Each layer in this folded paper, once cut, formed half of one of the snowflake arms, ensuring each arm was symmetrical. As I had folded the paper into 8 layers the final snowflake had 4 symmetrical arms, creating 4-fold rotational symmetry:
This four arms of this snowflake were created from paper folded to an angle of 360/8=45 degrees. For a snowflake with n-fold rotational symmetry, the n-arms are evenly spaced around the snowflakes centre. To create such a snowflake, you need to fold the paper so that the final fold divides the 360 degrees around the snowflake’s centre by 2n.
Folding 60 degrees
Our snowflakes 6 arms need to be spread evenly around the centre - so the centre of each arm should be 360/6=60 degrees apart. So we’ll need to start by folding the paper so the folds divide 360 degrees into 60 degree segments. This is how we do it:
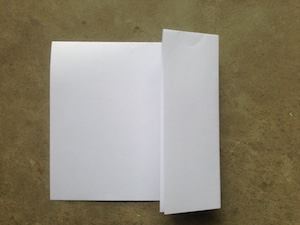
Fold the paper in half and then half again:
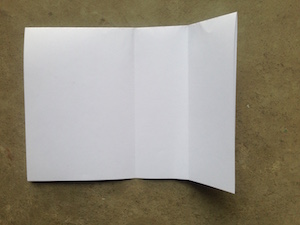
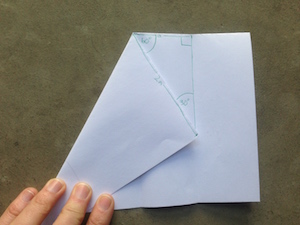
Then open your last fold and fold the edge into the centre
This has created a fold 3/4 of the way along this folded paper. Fold the left half so that the bottom-left corner meets the 3/4 fold:
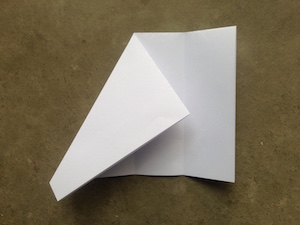
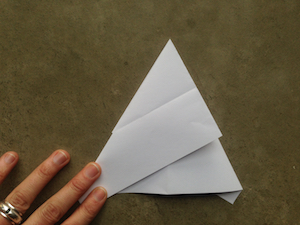
What you’ve made here is a right-angled triangle with a shorter side of length a (1/4 or the folded paper’s width) and a hypotenuse with length of 2a (1/2 the folded paper’s width). Thanks to some basic trigonometry, we know that the angle between these two sides is 60 degrees (as the cosine of this angle is 1/2 (a divided by 2a)). So you’ve folded a 60 degree angle and by folding the right side of the paper to match this fold:
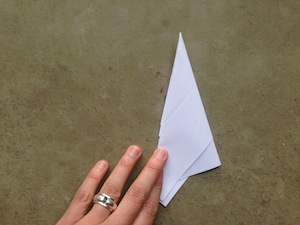
You’ve divided the 360 degrees around the centre of your snowflake into six 60 degree wedges, one for each of the arms. Now the fold you cut along to create your snowflake has to run down the centre of each wedge, so that you create 6 symmetric arms. So we fold our paper one last time, halving our 60 degree wedge
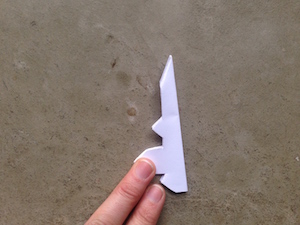
Cutting along this line will give us a beautiful snowflake with six-fold symmetry. Hooray!

Comments
Snowflakes
Wowcher this is amazing